Project: Pencil Vs. Camera
Inspired by artist Ben Heine
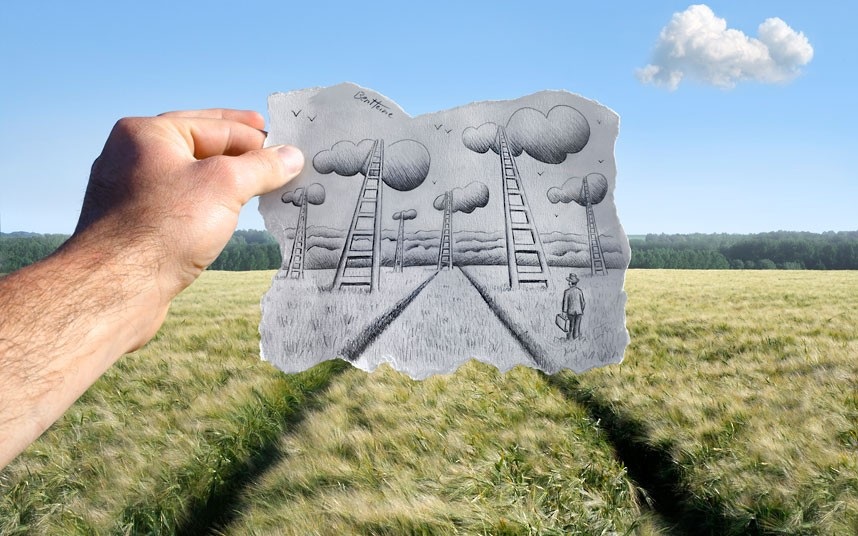
Ben Heine is a Belgian artist who has produced a huge number of artworks throughout the years. He is currently best known for his original series "Pencil Vs Camera", "Digital Circlism" and "Flesh and Acrylic". He has a degree in Journalism and is self-taught in drawing, digital photography and music (piano and drums). His graphic creations have been exhibited widely in Europe and more recently in Asia. His favorite art movements are Surrealism, Pop Art, Geometric Abstraction, Expressionism and Social Realism. A documentary about his work was released in 2012.
ISB Student Gallery of the Pencil vs. Camera project:
Pinterest Board to Ben Heine's Pencil vs. Camera series:
Steps:
1. Perspective Practice sheets-Understand 1 point perspective
2. Background Photo-Decide whether you will choose to take your own photo from somewhere around campus, OR use a photo of a landscape somewhere in Beijing.
Find China photos in Student Share in the folder Z_MSART>DRAWING
3. Print your chosen photo out on A3 paper. You may choose to print in Black&White (beginner) OR in Color (advanced)
4. 8 Step Pencil Value Scale practice-use 2B and 4B pencils
5. Gradient Value Practice
3. Draft-On a plain piece of paper, sketch out a rough draft of your idea to fit with your photo. You may use the tracing tables to help you get your lines connected. Remember, your drawing idea should be imaginative and defy reality, yet fit with the background photograph.
4. Group Critique-let's give and receive feedback from classmates to improve our idea before beginning the final paper.
5. Final paper-Make your imaginative idea a reality, but focus on shading carefully and smoothly to achieve the illusion of depth with your use of values.
6. Photograph your finished drawing-Photograph your hand holding your completed drawing.
7. Photoshop your hand photo on top of your background photo. Ms Z will provide tutorials for you to follow.
8. Submit finished photo-Place final photo into Student Share folder.
