Hand Lettering
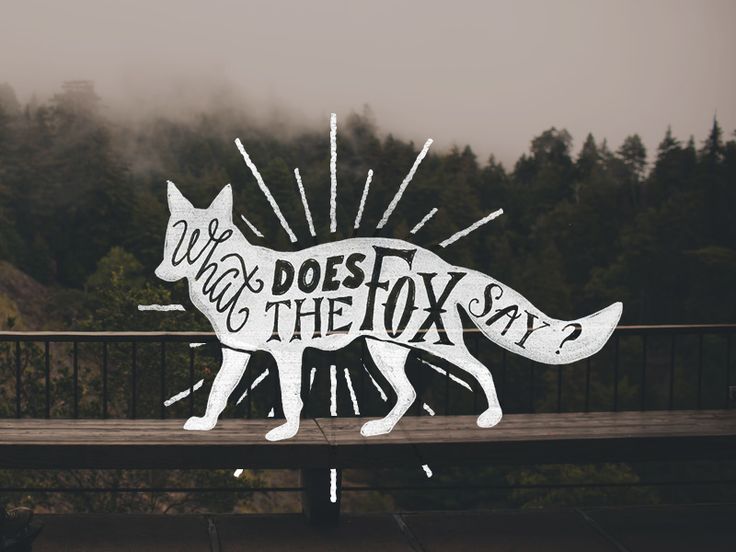
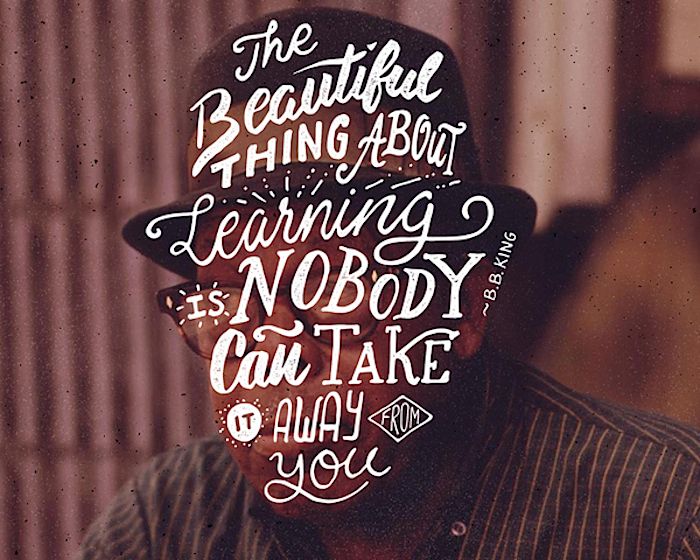
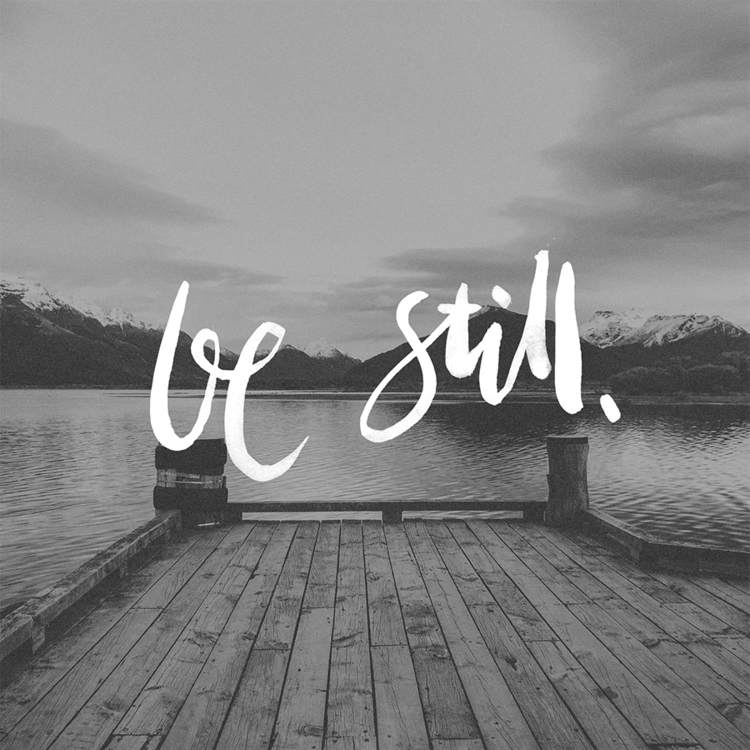
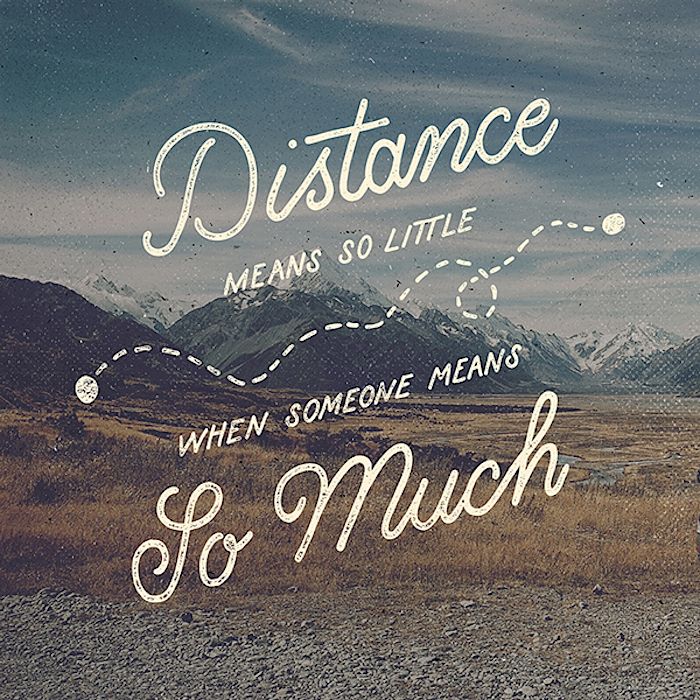
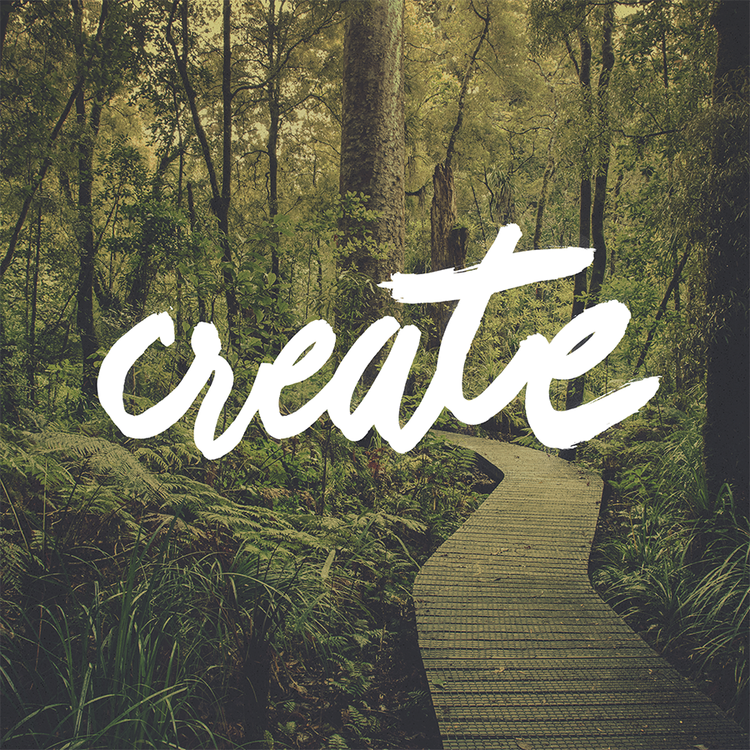
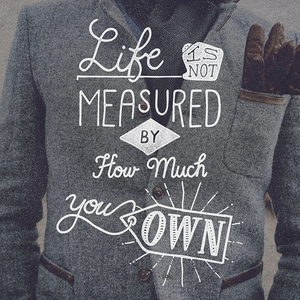
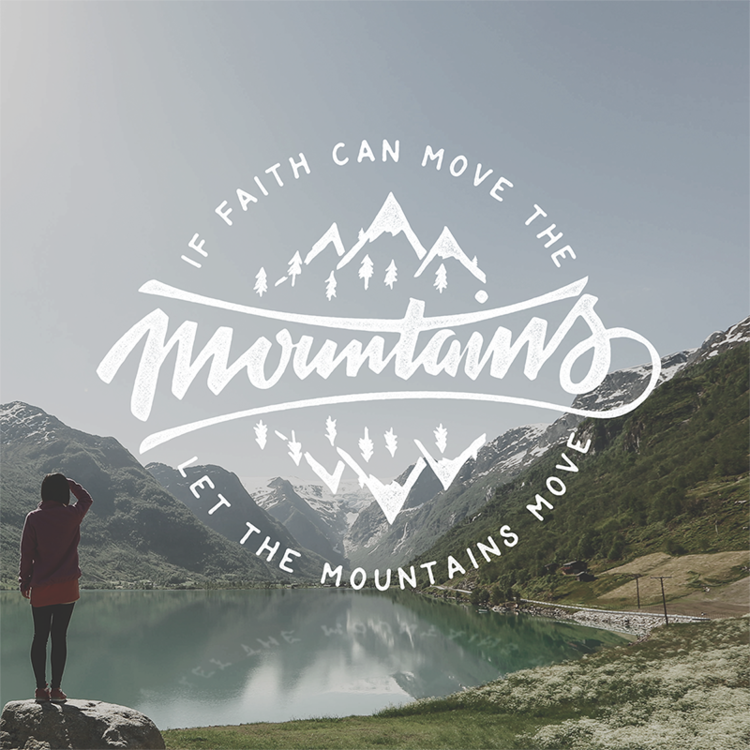
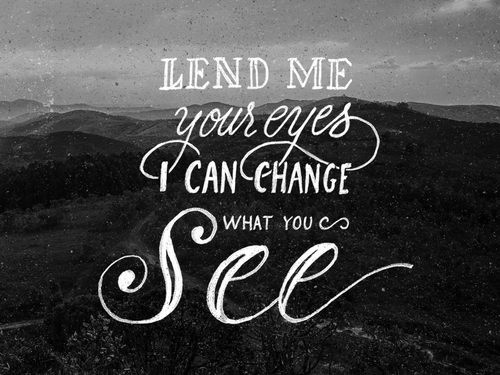
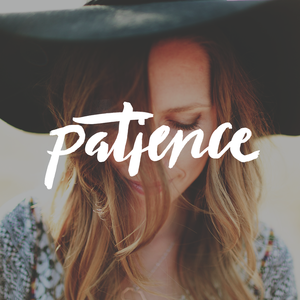
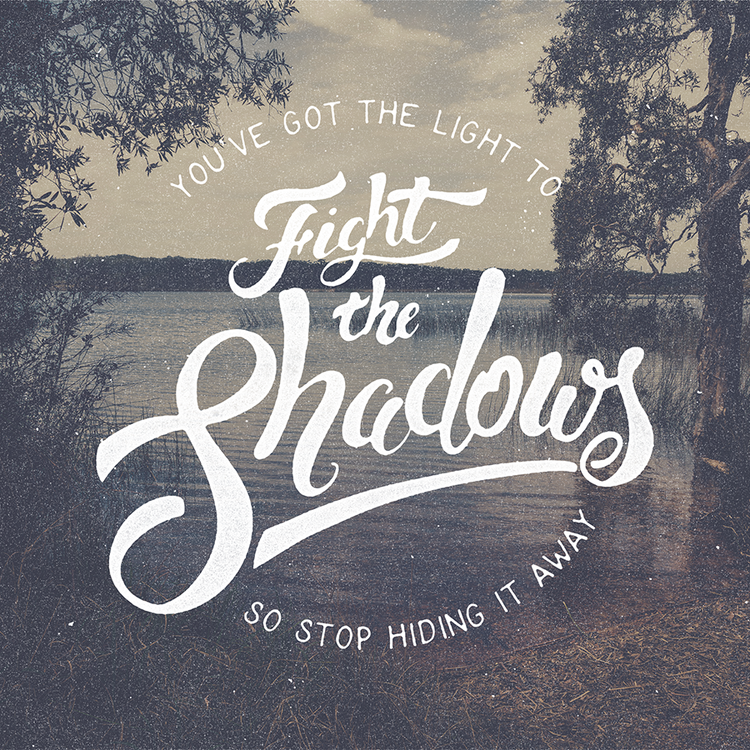
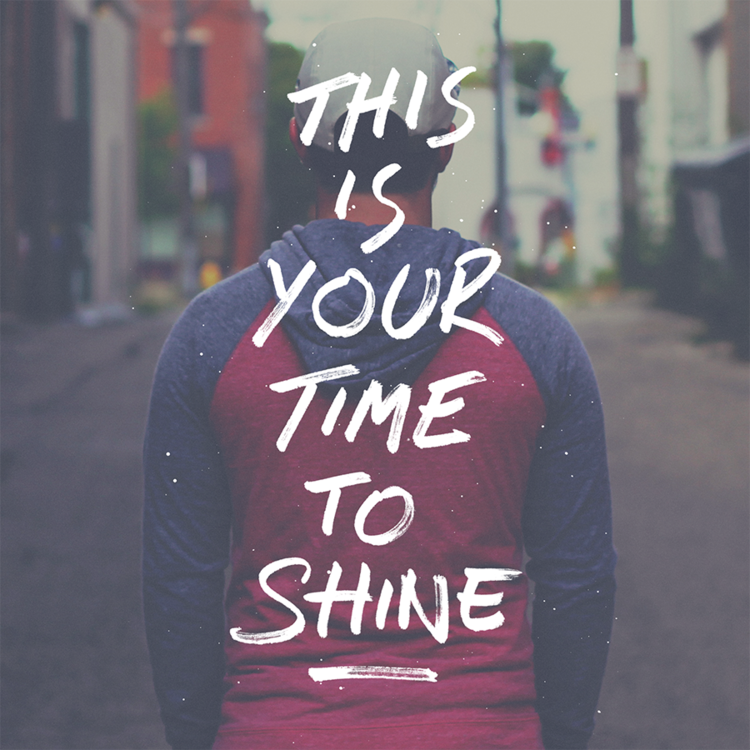
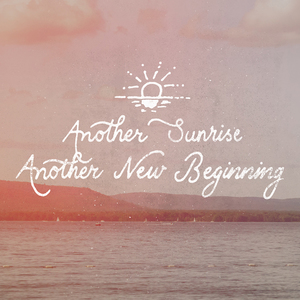
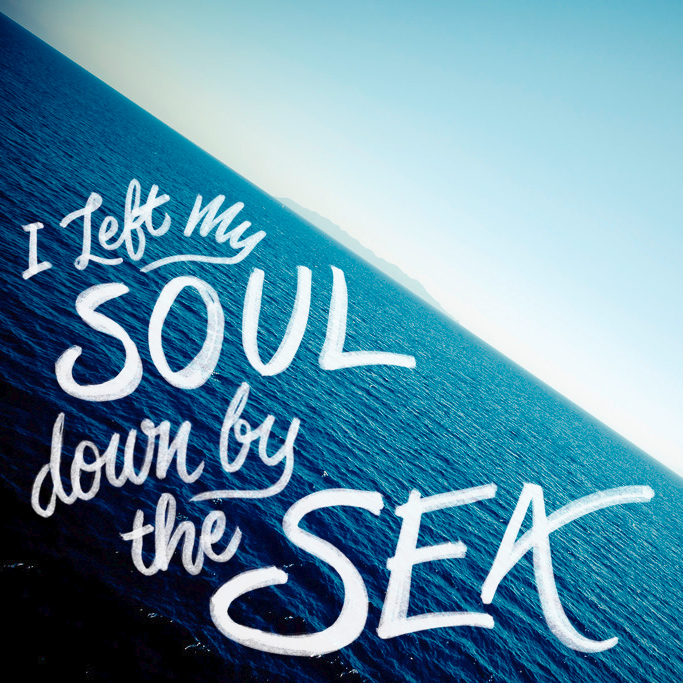
Below are images from hand letterer and illustrator, Ian Barnard. As you can see, he layers his hand written words or phrases on top of a photograph.


Outline of this project
Studio outcome:
-2 hand lettered quotes/phrases overlayed on corresponding images
--1 hand lettered quote/phrase must be detail oriented and clean in design (SLOW)
--1 hand lettered quote/phrase must be done with ink and a brush (FAST) Example
1. Get inspired!
Look at Hand Lettering online. There's so much good stuff out there!
The curated best on Instagram @goodtype on Instagram, @thedailytype on Instagram,@handmadefont on Instagram
- Dribbble: The best of the best designers show off here. Look for lettering here to inspire you.
- Pinterest: Since this is such a visual social media platform, you can catch a ton of great stuff on here.
People to follow on Instagram that do great hand-lettering work:
Mister Doodle for a tight, technical, flowing illustrative style: @misterdoodle on Instagram
Nick Fred for a classy, hipster, rough texture: @nick_fred on Instagram
Sean McCabe again for tight, technical clean work: @seanwes on Instagram
Decks for crusty motorcycle, tattoo style @deckysastra on Instagram
Chezmeka a punk, cartoonish, and bold style @chezmeka on Instagram
2. Imitate
Choose a hand lettered quote online that you are drawn to style-wise.
Print it out full size on A4 paper and secure a piece of tracing paper on top.
Trace out the quote in black pen to get a feel of the font style and the layout.
3. Freehand Draw
Choose a hand lettered quote from online (can be the same one you traced), and
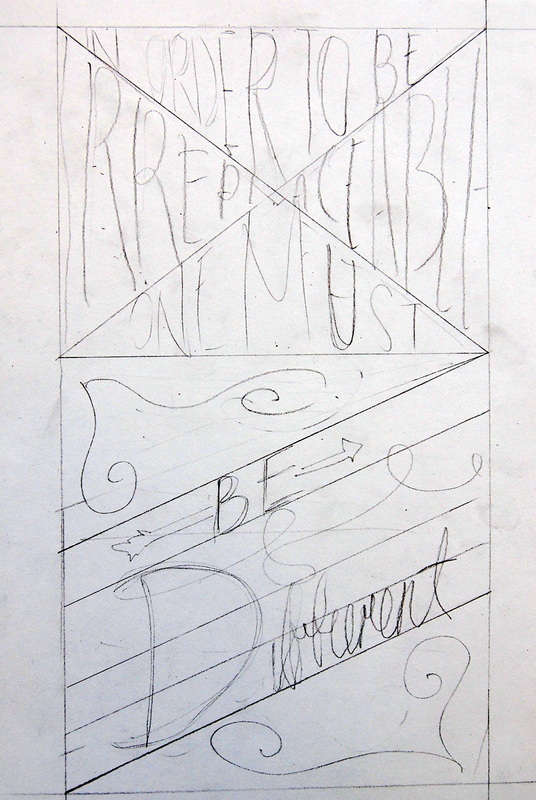
Below is my example of the freehand drawing imitation exercise. I used a ruler to map out some of the baselines and cap heights of the text. I documented my steps so you can see how I drew it out from start to finish.
My biggest piece of advice is to work on the WHOLE quote as a light sketch BEFORE you commit to darkening your lines.
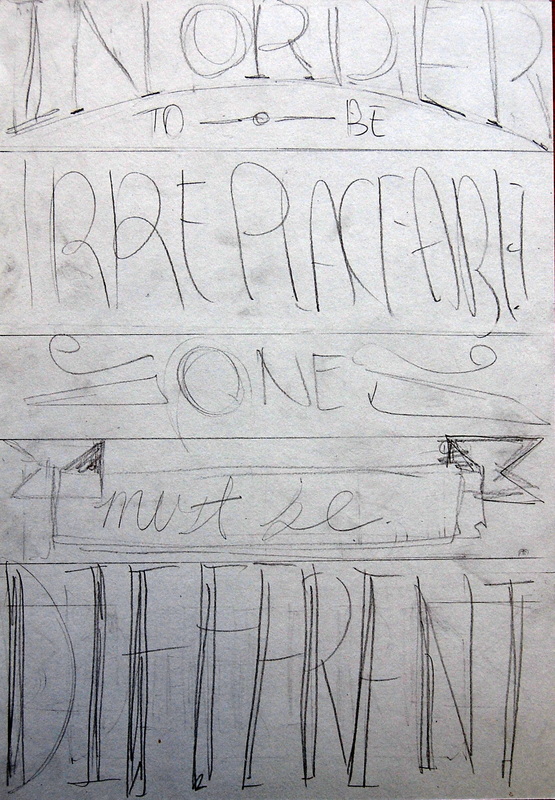
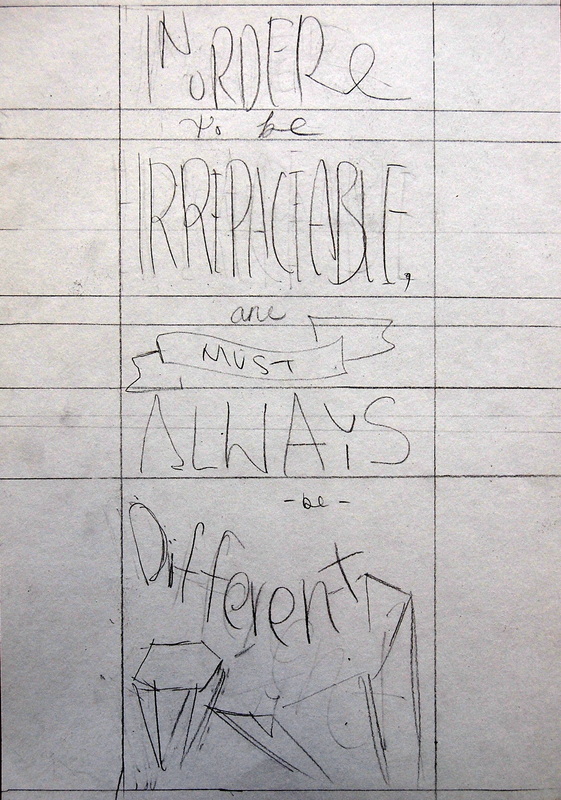
4. Planning your SLOW Quote Design
You will create 4 different layouts of your quote.
You are ready to begin the rough sketches of your SLOW and longer quote design. Your SLOW quote is the longer of your 2 quotes. "Slow" means it will be a planned out hand lettered design.
Decide what the most important words are in your quote and underline them.
These important words should stand out in size in your layout.
Don't worry about your lettering style at the moment, you are only planning out your layout and the size of your words.
Decide what the most important words are in your quote and underline them.
These important words should stand out in size in your layout.
Don't worry about your lettering style at the moment, you are only planning out your layout and the size of your words.
Below are excellent examples of 4 composition sketches exploring layout and word size with the same chosen quote:
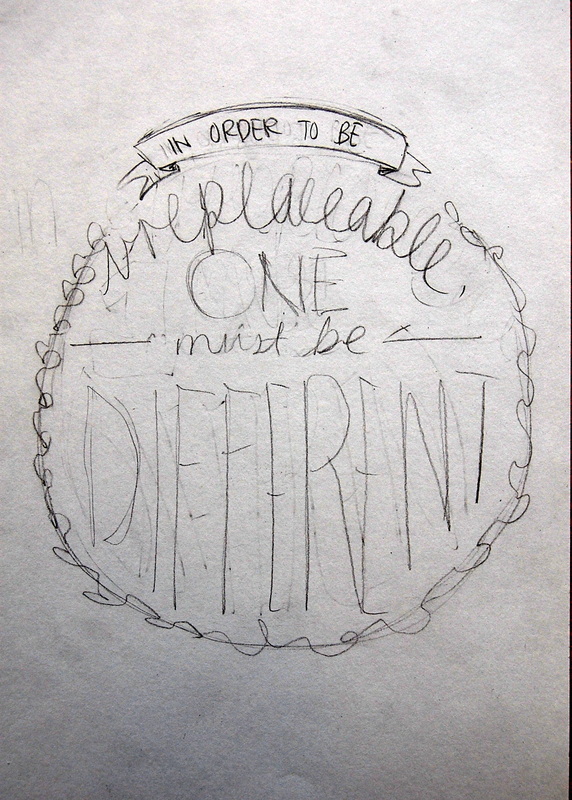
5. Begin working on your final.
Choose your favorite layout of the 4 you tried out and begin working on your final quote on A5 GRID paper.
You may work on GRID PAPER to help you with your word measurements.
Work on A5 size paper (half and A4 paper), so you can get this done on time. Use a RULER to mark your baselines on your text, and use a mechanical pencil to draw it out.
No need to color and shade anything on the paper. Just outlines are okay.
6. Tracing paper
You will now place a piece of tracing paper over your final and with your very best workmanship, trace your final lettering with black pen. You will shade and make all your final marks.
When you are done, give the tracing paper to Ms Z for scanning.
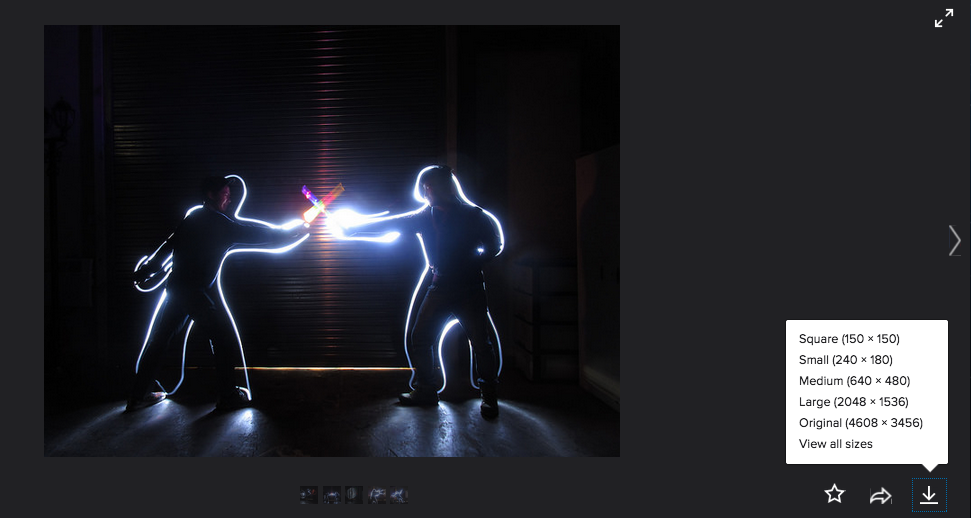
7. Choose your background photo
Connect to the School server, then to Student Teacher Workfolders <Z MS ART < Drawing < HS Photos and check for your quote. If your quote is not there, go to:
https://isblens.wikispaces.com, and click on student names on the left column.
Look at their FLICKR link
Download the original size of the image you want to use as your background.
Below is a screenshot of how to find the original size of the image. No screenshots!!!!
Choose your favorite layout of the 4 you tried out and begin working on your final quote on A5 GRID paper.
You may work on GRID PAPER to help you with your word measurements.
Work on A5 size paper (half and A4 paper), so you can get this done on time. Use a RULER to mark your baselines on your text, and use a mechanical pencil to draw it out.
No need to color and shade anything on the paper. Just outlines are okay.
6. Tracing paper
You will now place a piece of tracing paper over your final and with your very best workmanship, trace your final lettering with black pen. You will shade and make all your final marks.
When you are done, give the tracing paper to Ms Z for scanning.
7. Choose your background photo
Connect to the School server, then to Student Teacher Workfolders <Z MS ART < Drawing < HS Photos and check for your quote. If your quote is not there, go to:
https://isblens.wikispaces.com, and click on student names on the left column.
Look at their FLICKR link
Download the original size of the image you want to use as your background.
Below is a screenshot of how to find the original size of the image. No screenshots!!!!
8. Learn how to digitally overlay text on an image.
You will need 2 things on your desktop before you begin the youtube tutorial:
-your scanned lettering image
-your chosen background photo
Also, you may have have to rotate your scanned image in Photoshop first, and I forgot to mention this in the tut.
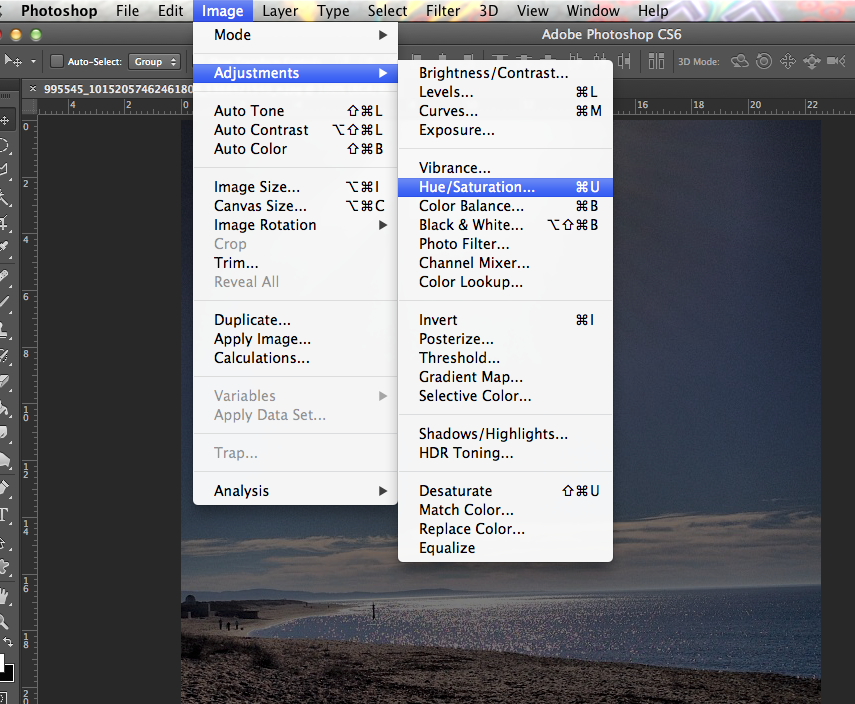
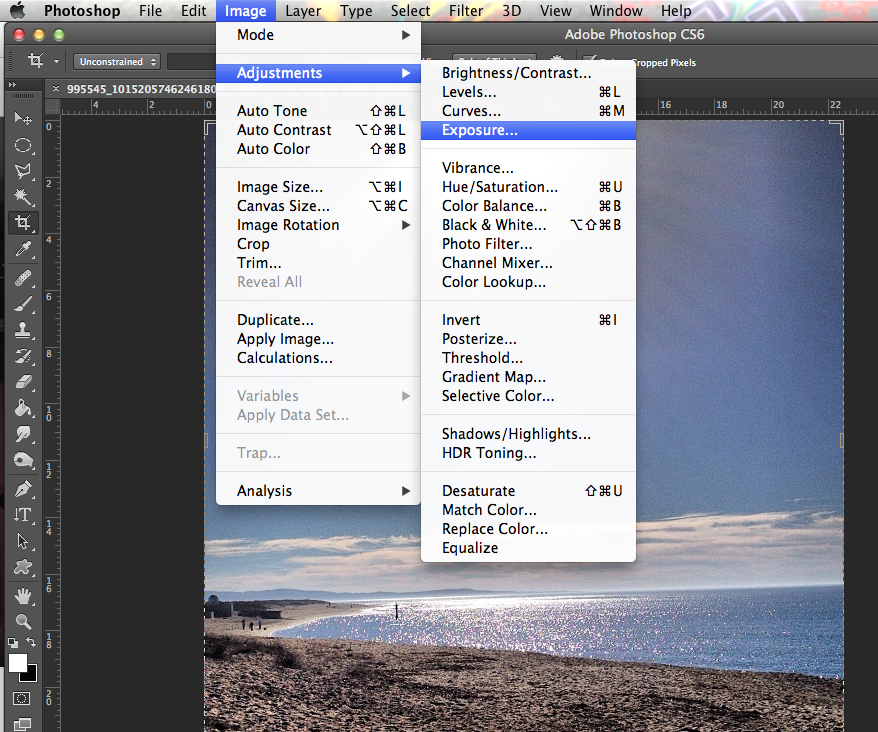
To rotate, go to the Image tab, and then select on Image Rotation. This should do the trick. 90 degrees CW (clockwise) or 90 degrees CCW (counter clockwise).

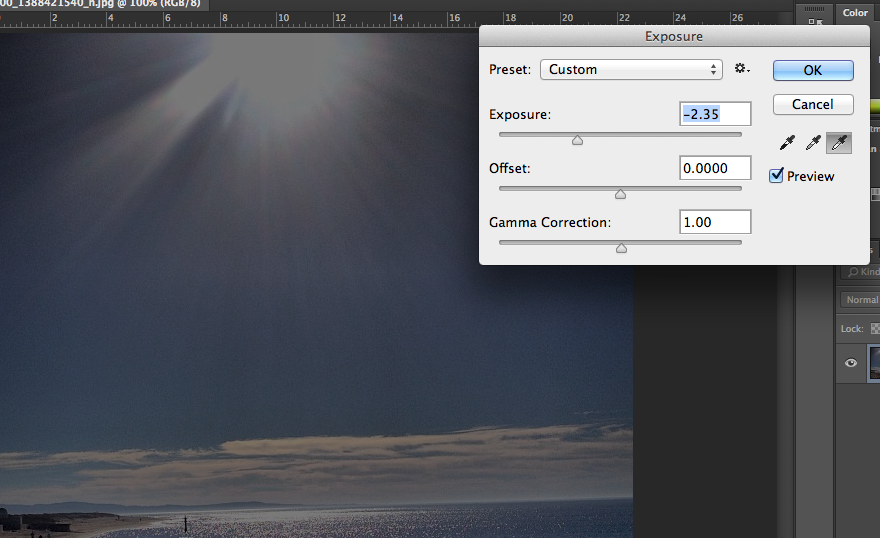
To make your background darker, adjust the Exposure on your image.
This may be necessary if your background photo is too bright.
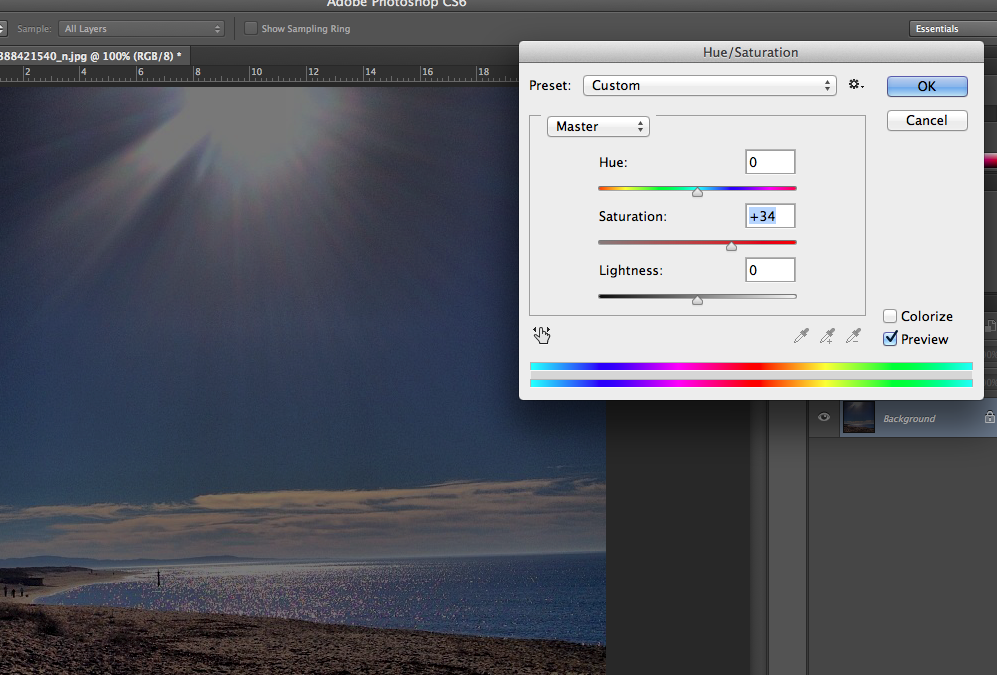
To increase the color intensity (saturation), adjust your Hue/Saturation levels. This will make your colors look more intense.